Want to do more pullups? Whether you can do 18 pullups or none at all, this training guide will show you four proven methods to increase your pullup count quickly.
My Story: Pullups were an army requirement!
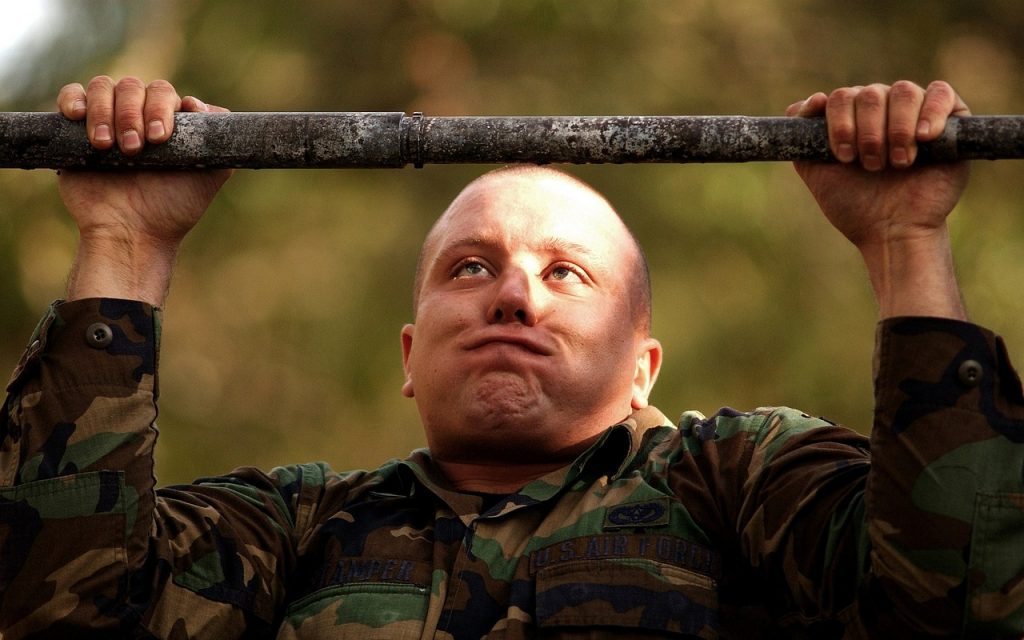
In 2010, I had to perform at least 8 pullups to qualify for the enhanced recruit intake for the army. At that time, I couldn’t even do one.
So, I trained for 2 months.
Within two weeks, I achieved my first pullup. Gradually, I increased my reps to eight, just in time for the test, and was accepted into the enhanced batch of recruits.
My progress was slow because I couldn’t find reliable pullup guides for total beginners. I had to piece together various bits of advice.
If you’re in the same boat, stop searching and start training with these proven methods.
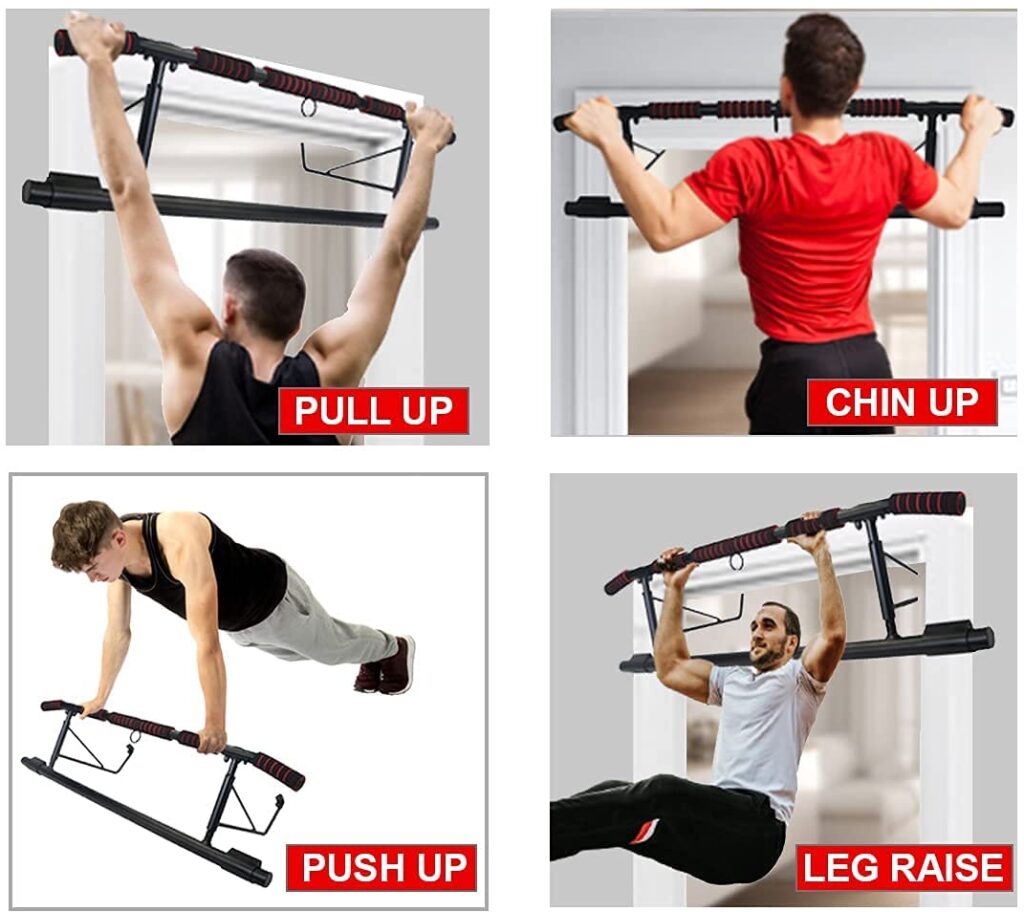
Pullups vs. Chinups: What’s the Difference?
What’s the differences between pullups and chinups? Aren’t they the same?
Similarities in Both Exercises
- Both exercises start with you hanging on a bar and pulling yourself up until your chin is above the bar. Many calisthenics athletes pull high enough for their upper chest to touch the bar.
- Your arms should be shoulder-width apart for both.
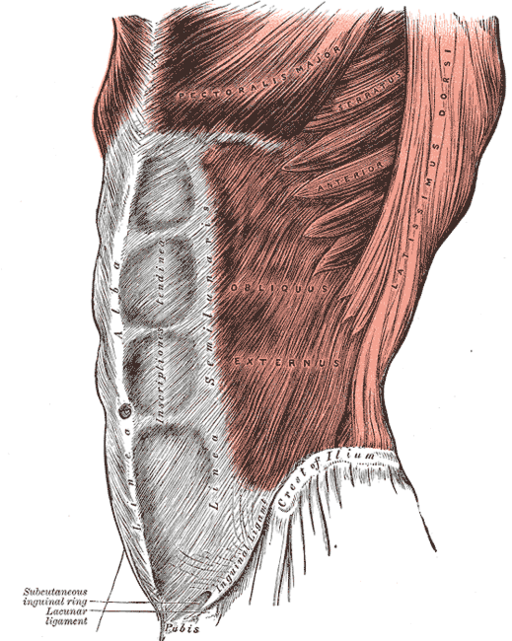
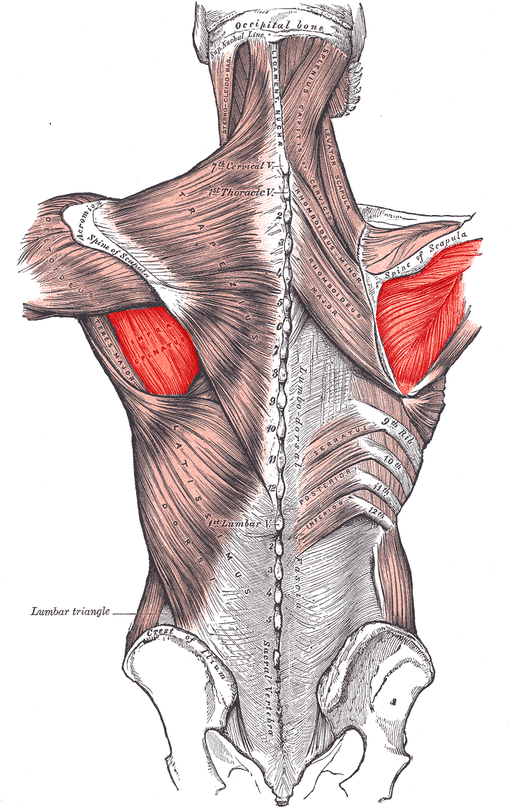
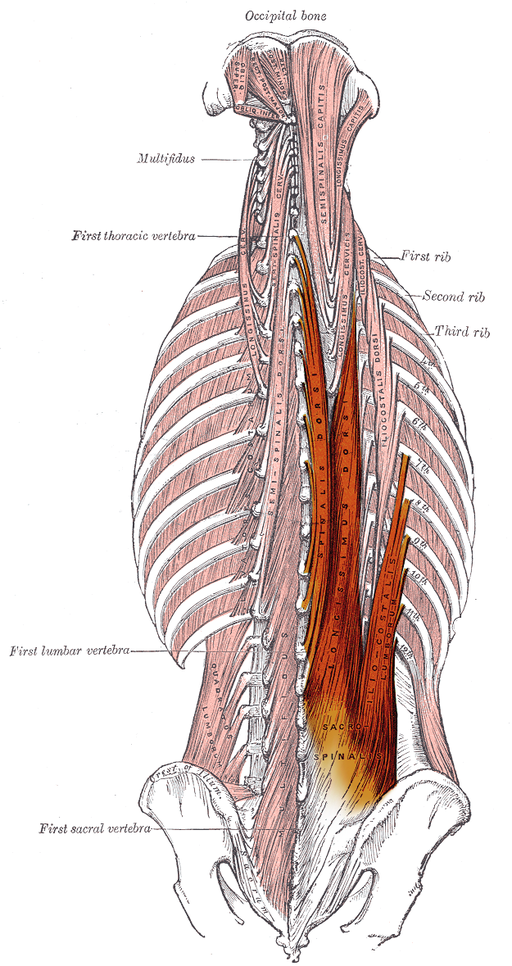
- They work the same seven muscle groups.
Differences – Grip and Intensity in Each Muscle Group
Although both pullups and chinups use the similar movements and muscle groups, the forearm grip technique (i.e. overhand vs underhand) is different. As a result, the same muscles groups are exerted at a different intensities for pullups (see the table below), which makes pullups tougher.


| Factors | Pullups | Chin Ups |
|---|---|---|
| Grip | Overhand/Pronated Grip (palms facing forwards) | Underhand/Supinated Grip (palms facing you) |
| Overall intensity | Pullups work the center of your upper back at greater intensity. | Chinups relegate the movement to your chest and biceps (arms). Hence, the higher intensity in those areas. |
| Intensity of Lower Trapezius | Higher intensity | Lower intensity |
| Intensity of Pectoralis Major | Lower intensity | Higher intensity |
| Intensity of Biceps Brachii | Lower intensity | Higher intensity |
What should you train? – Pullups vs Chinups
So if you want a complete back exercise that’s more challenging, do pullups. Because chinups rely more on your biceps and pecs, they are easier to do. Besides that, there are no other differences in muscle groups worked.
I prefer pullups to chinups. I’d rather do dips and push-ups for biceps and chest.
Ultimately, whether you want to increase chinups or pullups, the training is the same.
What Pullup Equipment Do You Need?
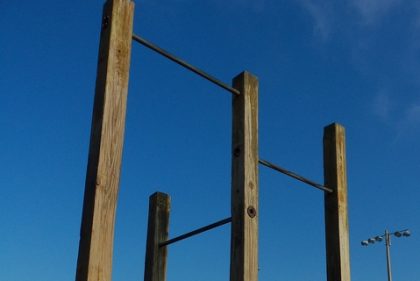
Pullup Bar
Pullup bars are everywhere at gyms and fitness facilities. But, if you truly want to get better at pullups, having a pullup bar near you increase the likelihood of you randomly training.
Convenience is the key to succeeding in a new training regime. Consider getting a doorway pullup bar for your home or office.
Recommended:
I recommend the Multi-Function Pullup Bar because of the quick setup — no screws or drilling — and the safety and durability (unlike alternatives that break within weeks). It also comes with a free resistance band, which you can use for assisted pullups.
Tip: Every time you pass the doorway, do pullups! Need to take a break from work? Do pullups. The doorway pullup bar a great way to incorporate quick sets into your routine. If you have to take great pains just to find a pullup bar every day, you’ll lose motivation and give up.
Resistance Bands

Resistance bands are essential for assisted pullups, unless you have a gym buddy to help you out every time you train. If you want to train in assisted pullups daily, consider getting a pullup resistance band.
Recommended:
I recommend the Pullup Assistance Bands System because it’s designed by a certified NASM-CES strength coach and is a lot more sturdy than regular resistance bands. It is meant for intensive use.
I don’t know about you but I have a fear of bands snapping into my face. This specific band system works with any pullup bar and can be used for other home workouts.
Your Body
Ensure you’re injury-free. If you have a pre-existing injury, consult a doctor before starting.
How to Do the Pullup Correctly?
Learning to perform pullups correctly will ensure you progress in your calisthenics training quicker and save you from unnecessary injuries. Follow these key points:
Grip Position
- Grip the bar shoulder-width (or slightly wider) apart.
- Use a full grip with your fingers curling around the bar and touching your thumb.
- Alternatively, the grip that I use involves curling the four fingers and the thumb over the bar.
Active Hang
- Engage your scapula and pull your shoulder blades down before starting your pullup.
- Avoid switching to a passive hang during consecutive pullups to prevent shoulder injuries. Keep your scapular engaged to avoid wear-and-tear shoulder injuries.
Engage your scapula and pull your shoulder blades down before starting your pullup.Avoid
Find out exactly how to activate your shoulders and hand in this section (refer to 1. Active Hang).
Full Range of Motion
Your arms should start fully extended at the bottom position. Then, pull yourself up so that the chin goes above the bar; it’s even better if your chest nearly touches the bar. Repeat.
- Perform pullups slowly and with control to achieve full ROM.
- Ensure your chin passes the bar at the top and your arms fully extend at the bottom.
- Keep your feet behind and avoid swaying.
Controlled Movement
No kipping or using of momentum. Unless you’re using momentum to teach your body the motion of the pullup, kipping is considered cheating.
- Engage your core and posterior chain throughout the movement.
- Your body should form a straight line from head to toe.
Using momentum is a useful learning tool but stop kipping the moment you manage your first pullup. Your movement should be controlled.
4 Proven Ways to Do More Pullups
These four methods can help you increase your pullup count quickly. If you can’t do a pullup yet, start with methods #1 and #2. In the first two methods, we focus on building upper body strength and helping you learn the muscle coordination motion needed to do a pullup.
If you can already do at least 3 pullups, try methods #3 and #4 instead.
Proven Method #1: Grease The Groove
Without knowing it, I used the Grease the Groove method by Pavel Tsatsouline for my pre-army pullup training. Several times a day, I visited my neighbourhood fitness area to attempt pullups. This method essentially means doing as many “pullups” you can; the pullups could be easier progressions or half-attempts.
In the beginning, I barely did half of a pullup. But I just cranked out whatever I could. When I was tired, I hung on the bar for as long as I could. I will give you the list of easy progression pullup exercises to grease the grove.
So this is the single-most important method for increasing pullups — even if you can do zero. To do more consecutive pullups, you need to train more in pullups (or half pullups). You need to be obsessive. You need to put in more time.
Goal: Do not train to failure. Instead, build strength and practice the movement to let your nervous system learn the motion.
For convenience: Get a doorway pullup bar. Every time you walk past it, you’ll be tempted to try pulling up. With more attempts, you’re teaching your body to make subtle adjustments.
Important tip: Whether you’re handing or pulling, remember to engage your scapular muscles to avoid shoulder impingement in the long run.
But, how do you grease the groove if you can’t even do one pullup?
List of Low pullup progression exercises for “greasing the groove”
Doing more pullups every day is a solid strategy. But what if you can’t even do one? Jerk your body up all day long, with zero noticeable progress?
No. That’s discouraging and boring!
Here’s a list of pullup strengthening and coordination exercises. Although you aren’t yet doing pullups, you’ll get there with these low-level progressions. Some demo videos available after this table.
| Exercise | Instructions | Purpose | Suggested Reps (or Length of Time) |
|---|---|---|---|
| Active Hangs | 1. Grip the bar shoulder-width apart. 2. Engage your scapula and pull your shoulder blades down. 3. Hold this position. | Strengthen grip and activate shoulder muscles | Hold for 20-30 seconds per set |
| Scapular Pullups | 1. Hang from the bar with an overhand grip. 2. Engage your scapula and pull your shoulder blades down. 3. Lower back to starting position. | Improve scapular strength and control | 8-10 reps per set |
| Negative Pullups | 1. Jump to get your chin above the bar. 2. Lower yourself slowly (5-10 seconds). 3. Repeat. | Build eccentric strength and muscle control | 3-5 reps per set |
| Halfway Pullups | 1. Start in an active hang position. 2. Pull yourself as high as you can. 3. Lower back to starting. | Develop strength in the mid-range of the pullup motion | 6-8 reps per set |
| Inverted Rows | 1. Position yourself under a bar with feet on the ground. 2. Pull your chest to the bar, keeping body straight. 3. Lower back to start. | Strengthen back and biceps, improve pulling mechanics | 10-12 reps per set |
| Assisted Pullups (Band) | 1. Loop a resistance band around the bar. 2. Step both feet into the band. 3. Perform pullups with band support. | Provide assistance for full range of motion pullups | 6-8 reps per set |
| Assisted Pullups (Partner) | 1. Partner supports you by holding your legs or hips. 2. Perform pullups with partner assistance. 3. Partner adjusts support as needed. | Offer variable assistance based on strength and progress | 6-8 reps per set |
| Chin up | 1.Grip the bar with an underhand (supinated) grip, shoulder-width apart. 2. Pull yourself up until your chin is above the bar. 3. Lower yourself back down in a controlled manner. | Strengthen biceps and chest, improve pulling strength | 6-8 reps per set |
Active hangs are performed by hanging on to the bar while keeping your scapular activated. Make sure to pull your shoulder blades down and together at the back.
So, how do you know whether you are in the passive or active position?
If your shoulders are shrugged up to your ears when hanging, you’re in the passive position. In an active position, your shoulder blades are pushed down and together. There should be some distance between your shoulders and ears. Also, your chest would be extended slightly forward.
How do you incorporate this into your pullup regime?
Hang with your shoulder blades activated for 10 to 60 seconds (depending on your level of fitness). This helps your body learn how to correctly engage your back muscles. It also increases the time you can grip a pullup bar.
In effect, you’ll gain the grip and muscles needed to do a pullup.
This is similar to the active hang, except that there is a tiny engagement and release in your back.
Jump and use the upward momentum to pull yourself up. Your chin should go above the bar. Then, slowly lower yourself down. Make sure that your shoulder blades are pulled down.
Doing negative pullups is one of the best ways to learn the pullup motion but in reverse. Instead of pulling yourself up in a negative pullup, focus on lowering yourself down slowly.
The Inverted Row (aka. Australian Pullups, Inclined Pullups or Inverted Pullups) can be done almost anywhere, even at home.
If you are training outside, use the parallel bars. At the gym? Modify the Smith machine. At home? Use a sturdy desk or dining table.
Assisted Pullups with Resistance Bands
If you wish to train at home, make use of your doorway pullup bar and hang the resistance band as shown in the video.
Assisted Pullups Machine
Assisted Pullups with a training partner
If you have a training buddy, have them assist you with three to ten more pullups/chinups (only after you’ve performed the maximum number of unassisted pullups/chinups). Repeat the set twice with a 5-mins break in-between.
Avoid using the assisted pullups technique demonstrated in the video below. It is a safety issue.
By having your buddy hold your feet, you are risking injury. People have accidentally let go off the bar when exhausted and fallen face first onto the ground.
As mentioned, chinups are easier to do than pullups because you are relying on the biceps and chest.

Remember… where pullups are performed with a pronated grip, chinups are done with a supinated grip (reverse or underhand-grip).
Try them out and you may be surprised. They ingrain the
General Guidelines for your “Grease the Groove” training
Begin with the most difficult exercise of the bunch, and then move on to the easier progressions. DO NOT train to failure.
Also, make sure to switch between the exercises listed. Each exercise has its benefits.
- For a few times each day, do two to three sets of each exercise. Depending on intensity, take a 1 to 4-minute break between sets.
- Every hour, go to a pullup bar and get five to ten minutes of exercises done, the time includes resting between sets. If hourly isn’t possible, then every time you take a break. This is why having a pullup bar at your doorway (or nearby facility) is beneficial.
Never compromise your form in any of the exercises — unless you want to develop terrible injury-inducing habits. If you are too fatigued to engage the right muscles, do a lower progression of the exercise.
Again, greasing the grove does not mean training to failure!
After One-week of Training
When I was a beginner, I did max reps each hourly session. For example, if I did halfway pullups, it’d be until I could barely pull myself up. I then moved on to inclined pullups. When I couldn’t do that with proper form, I did active hangs.
You can do the same after your first week of trying out the exercises. Get your form right first.
Note: Take a look at Posey’s Marine Pull Up program (below) as it also caters to complete beginners.
Recommended:
Multi-Function Pullup Bar
No screws and no drilling! Just attach and detach this sturdy pullup bar from your door frame in a jiffy.
P.S. Comes with a free resistance band
Proven Method #2: Marines Pull Up Program by Posey
Because pull ups are a challenging exercise for beginners, Major Misty Posey’s training program focuses on building these foundational elements progressively to help beginners achieve their first pull-up. Participants have reported going from zero to one within their second week.
Mindset and Preparation
- Mindset: Approach pull-ups as a skill that improves with practice. Stay committed and patient throughout the process.
- Equipment: Use a sturdy pull-up bar that allows a full range of motion.
Exercise Regimen
There are four main exercises designed to build the necessary strength and technique:
| Exercise | Execution | Purpose |
|---|---|---|
| Partner-Assisted Pull-Ups | Work with a partner who lightly supports your back to assist in completing the pull-up motion. | Helps familiarize your body with the pull-up movement pattern. |
| Negative Pull-Ups | Start at the top position (chin over the bar) and lower yourself slowly. | Develops the strength needed for the upward phase of the pull-up. |
| Jumping Pull-Ups | Use a controlled jump to propel yourself up to the bar, then lower yourself down slowly. | Builds explosive strength and reinforces the pull-up motion. |
| Partial-Range-of-Motion Pull-Ups | Perform pull-ups within a limited range of motion, focusing on the initial upward movement. | Strengthens specific portions of the pull-up range. |
Training Approach
- Frequency: Perform pull-up progressions 3 to 5 times per week.
- Volume: Aim for 3 to 5 sets of each exercise per session.
- Progression: Start with assisted variations and gradually reduce assistance as strength improves.
- Technique: Focus on engaging the back and arm muscles throughout the exercise.
Additional Tips
- Consistency: Regular practice is crucial for improvement.
- Rest and Recovery: Allow adequate rest between sessions to prevent overtraining.
- Nutrition: Maintain a balanced diet to support muscle recovery and growth.
- Tracking Progress: Monitor improvements by tracking the number of repetitions and the quality of each pull-up attempt.
By following Major Misty Posey’s structured approach and maintaining consistency, beginners can effectively build the strength and technique necessary to achieve their first pull-up within four weeks. Remember, each step forward, no matter how small, brings you closer to your goal. Good luck!
The Marine Pull Up Program by Posey is the only one that is completely friendly to complete beginners. This program is also effective enough that it is used at a Marines Corp Base.
Proven Method #3: Two Week Pull Up Push Workout

The Pull Up Push workout is a training regime by Stew Smith, a former Navy Seal. It is meant to blast your pullup reps through the roof in two-weeks.
Requirement: You need to be able to do between three to ten pullups before embarking on this program.
For the next 10 consecutive days, do an extra 25-50 pull-ups daily, depending on your current ability:
- If fewer than five pull-ups normally, aim for 25 pull-ups daily.
- If more than five pull-ups normally, aim for 50 pull-ups daily.
Odd Days (Pick either Supersets or Pyramids)
| Odd Days Routine | Exercises | Repetitions/Structure |
|---|---|---|
| Supersets (repeat 10 times) | Pull-ups | Max reps |
| Push-ups | 20 reps | |
| Dips | 5-10 reps | |
| Abs of choice | 30 reps | |
| Pyramids (alternate exercises) | Pull-ups | 1, 2, 3, 4, 5, 6, 7, 6, 5, 4, 3, 2, 1 |
| Push-ups | 2, 4, 6, 8, 10, 12, 14 … 2 | |
| Abs of choice | 5, 10, 15, 20, 25, 30, 35 … 5 |
Even Days
| Even Days Routine | Pull-up Supplement |
|---|---|
| Pull-ups | 25-50 pull-ups throughout the day or in a single workout |
Program Structure
- Rotate between odd-day workouts and even-day pull-up supplements for 10 days.
- Take 3-4 days off from doing any pull-ups after the 10-day routine.
- Test your pull-up progress on day 14 or 15.
This structured approach can help in effectively increasing pull-up numbers over a two-week period.
Proven Method #4: The Fighter Pull Up Program by Pavel
The Fighter Pull Up program is a thirty-day training regime that has been proven to double your reps. This is suitable for everyone – beginners and above.
These are the rough guidelines:
- Do 5 sets of pullups everyday
- After every five days, take a off day
- On the first session, do your maximum pullup reps for the first set. For every subsequent set deduct one rep.
Yes, the same Pavel who advocated for Grease the Groove. He was also a fitness instructor in the former Soviet Union.
Do More Pullups in 30-Days Challenge
You need to be doing pull-ups every day rain or shine if you’re serious about your goal.